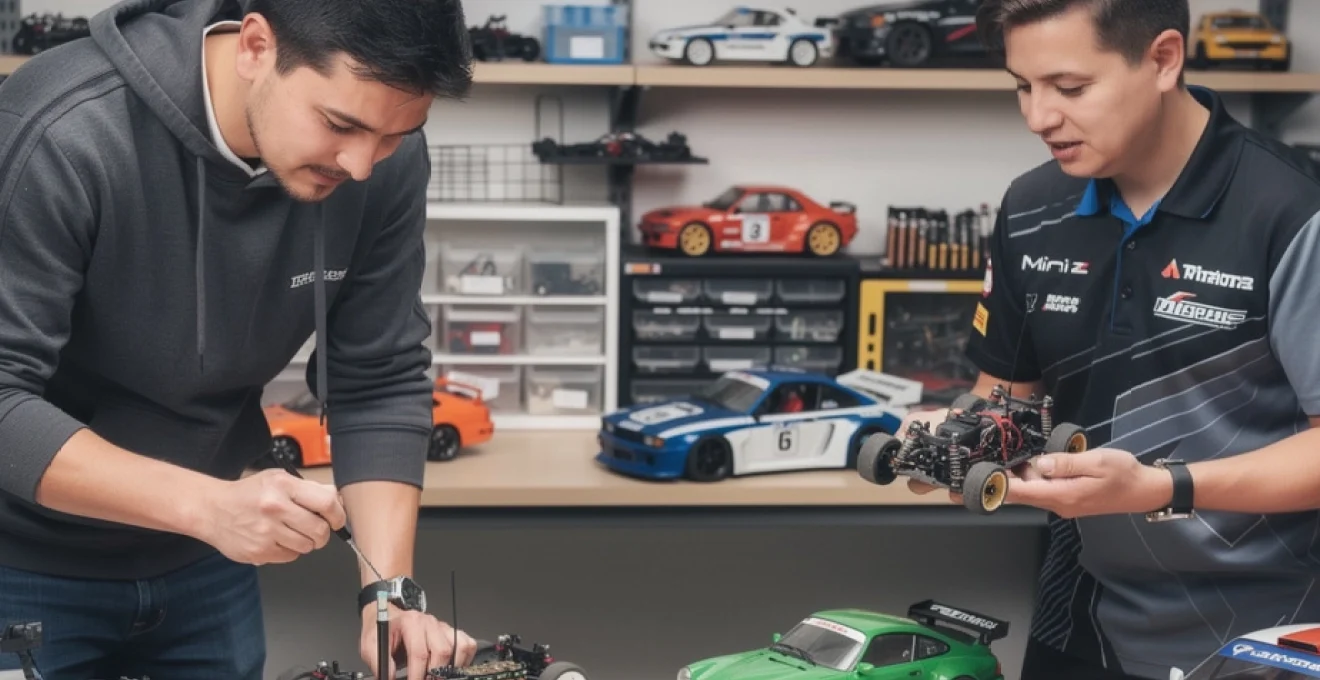
Classic Mini-Z cars occupy a unique place where scale modelling, slot racing, and full-size motorsport culture intersect. A well-built Mini-Z feels like a precision instrument in the hand, yet it remains small enough to run on a living-room track or a club’s RCP layout. For many enthusiasts, the charm lies in how faithfully these cars translate real chassis concepts, suspension geometry, and body proportions into 1:24–1:27 scale. If you enjoy collecting vintage radio-controlled models, racing on technical indoor circuits, or simply recreating iconic racing liveries, understanding the heritage and specifications of classic Mini-Z platforms helps you unlock far more performance and satisfaction from every run.
Origins of classic Mini-Z cars: kyosho lineage, scale philosophy, and chassis evolution
Kyosho Mini-Z series launch history: from MR-01 (1999) to MR-04 and evolution of the classic platform
The Mini-Z story begins in 1999 with the launch of the MR-01, Kyosho’s first palm‑sized, fully proportional R/C touring chassis. At around 1:27 scale and powered by four AAA cells, it offered indoor-friendly speeds with genuine hobby‑grade electronics. The MR‑01’s integrated PCB and servo made it compact but also limited in terms of upgrades. Over the following decade, Kyosho refined this core idea, releasing the MR-02 with a lower centre of gravity and the MR-03 with modular front ends and 2.4 GHz control. The MR‑04 concept further modernised electronics while still preserving compatibility with much of the classic ecosystem. For anyone collecting or racing “heritage” Mini-Z cars, this early MR lineage defines what most drivers instinctively call the classic platform.
1:24 and 1:27 scale design rationale: wheelbase, track width, and body shell compatibility constraints
Why did Kyosho choose 1:24–1:27 scale when 1:10 and 1:18 were already established? The answer is a balance between detail, drivability, and domestic practicality. At roughly 160–180 mm in length, a Mini-Z can run on a compact RCP circuit yet still carry realistic suspension geometry and scale steering angles. Classic wheelbases, typically from 86 mm up to 102 mm, allow bodies like the AE86, Porsche 911, and Skyline GT‑R to look correct without awkward stretching. Track width is tightly controlled too, with narrow and wide front ends paired to matching bodies. Body shell compatibility becomes a kind of puzzle: if you own multiple minis, you soon learn that a 94 mm LM motor mount or a 98 mm RM mount can transform which shells you can use and how your favourite chassis handles.
Influence of full-size classics: nissan skyline GT-R KPGC10, mazda RX-7 SA22C, and porsche 934 RSR liveries
Classic Mini-Z bodies are more than just plastic shells; they are tributes to full-size legends. The boxy Nissan Skyline GT‑R KPGC10, often called Hakosuka, appears in Mini-Z form with period-correct fender flares and JDM ride height. The first‑generation Mazda RX‑7 SA22C, with its sharp nose and pop‑up lights, brings early rotary heritage into the 1:27 world. Perhaps the most iconic is the Porsche 934 RSR, reproduced with sponsor logos from period endurance races, capturing the aggression of Group 4 bodywork. These tributes show how closely miniature racing culture follows real motorsport history: you can race a 934 RSR Mini-Z on a foam track while watching archival footage of the same livery at the Nürburgring.
Mini-z sub-platforms overview: MR rear-wheel drive, MA AWD, FWD, buggy, and their “classic” generations
The Mini-Z family quickly grew beyond a single rear‑wheel‑drive touring chassis. The MR line covers RWD “RM/MM/LM/HM” touring and GT cars, forming the backbone of most club racing classes. The MA AWD sub-platform adds a front gearbox and centre shaft, echoing full-size rally and GT4 machines. Later, Kyosho introduced a dedicated FWD front‑motor, front‑drive Mini-Z and even an off‑road Buggy with long‑travel suspension. When enthusiasts refer to “classic Mini-Z,” they usually mean first- and second-generation MR and MA chassis: MR‑01, MR‑02, MR‑03 (non‑EVO) and MA‑010/MA‑015. These generations use brushed motors, discrete FET H‑bridges, and modular, yet recognisably old‑school, electronics that invite hands‑on tuning.
Classic Mini-Z chassis architectures: MR-01, MR-02, MR-03, MA-010 and MA-015 compared
MR-01 vs MR-02: PCB layout, servo mechanism, and steering geometry refinements
The jump from MR-01 to MR-02 was more than a cosmetic update. The MR‑01 placed its PCB high in the chassis and used a relatively tall servo layout, resulting in a higher centre of gravity and more roll. The MR‑02 redesigned the electronics stack, lowering the PCB and servo and narrowing the chassis for a more scale track width. Steering geometry was also refined, reducing bump‑steer and improving Ackermann characteristics, so the inner and outer front wheels tracked more naturally through tight corners. For you as a driver, that change translated into smoother turn‑in, less mid‑corner twitchiness, and a platform that responded more predictably to toe and camber adjustments on carpet or RCP foam.
MR-03 ASF/VE/PRO variants: 2.4 GHz electronics, FET stacks, and brushless-ready specifications
The MR-03 platform pushed Mini‑Z into the 2.4 GHz era. Early ASF variants eliminated the long AM antennas and dramatically cut interference, making club racing more reliable. The MR‑03 also made the front end modular, with different suspension clips to support HM, MM, and LM bodies on a single chassis. On the electronics side, Kyosho began to offer higher‑spec boards with stronger FETs, sometimes stacked for increased current handling. The MR-03 VE series integrated a sensorless brushless motor and dedicated ESC, giving stock drivers more efficiency and consistent power over a pack. MR-03 PRO and high‑grade boards became a favourite base for racers aiming to run hotter 43T motors without sacrificing reliability.
MA-010 and MA-015 AWD drivetrains: front and rear gear differentials, centre shaft, and torque distribution
The all‑wheel‑drive MA-010 introduced a compact dual‑diff drivetrain. A front gear differential sat inside a miniature gearbox, mirrored at the rear, with a centre shaft linking both ends. Torque distribution in the stock layout is effectively 50:50, which gives strong traction on low‑grip surfaces but can produce understeer on high‑grip RCP. The MA-015 refined suspension geometry and packaging, allowing more body options and slightly better steering response. Many enthusiasts experiment with silicone‑packed gear diffs in the rear and lighter grease in the front, effectively biasing on‑power grip and making the AWD chassis feel more rear‑driven and “alive” through sweeper sections.
Wheelbase and motor mount configurations: RM, MM, LM, HM and compatibility with classic body shells
Motor mount configuration is at the heart of Mini‑Z chassis tuning. Classic mounts include:
- RM (Rear Mount) – motor upright behind the rear axle, common with classic hatchback bodies.
- MM (Mid Mount) – motor laid down ahead of the rear axle, lowering the centre of gravity.
- LM (Low Mount) – optimised for low‑slung Le Mans and GT prototypes.
- HM (High Mount) – slightly higher motor position for narrow, taller body shells.
Each mount also defines allowable wheelbases: 86, 90, 94, 98, and 102 mm are the most common. For example, a 94 mm MM mount suits many Porsche 911 and AE86 shells, while 98 mm MM or LM is popular for GT cars like the Nissan GT‑R. If you want to build a “garage” of classic Mini‑Z bodies, planning motor mount and wheelbase combinations ensures that each shell sits at the right ride height and maintains its intended handling bias.
Suspension systems: t-plate flex tuning, friction damper, and tri-damper rear suspension on classic chassis
Despite the tiny scale, classic Mini‑Z chassis offer surprisingly sophisticated suspension. At the rear, the main flex element is the T‑plate, a thin strip of plastic or carbon fibre that connects the motor pod to the main chassis. By changing thickness and material, you tune longitudinal and lateral flex, much like anti‑roll bars on a full-size car. A simple friction damper on MR‑01 and MR‑02 uses grease and sliding plates to control pod movement, while later tri-damper systems add two side tubes and a central shock to keep the rear more composed on bumpy RCP tiles. The front end usually relies on kingpin springs and optional toe‑bar or double‑wishbone upgrades, letting you fine‑tune grip and responsiveness for different track layouts.
Powertrain and electronics specifications of heritage Mini-Z models
Brushed motor standards: kyosho X-Speed, PN racing 70T–43T, and rotational speed (RPM) benchmarks
Classic Mini‑Z powertrains are built around 130‑size brushed motors. The stock Kyosho silver can typically spins at around 18,000–20,000 rpm at 4.8 V with moderate torque, ideal for beginners. The first popular upgrade was the Kyosho X‑Speed, raising rpm closer to 23,000–24,000 and trimming lap times by roughly 5–10% on medium tracks. Aftermarket brands such as PN Racing extended this ladder: a 70T motor offers around 22,000 rpm with smooth power for stock classes, while a 43T modified can exceed 30,000 rpm and push top speeds above 30 km/h on tight indoor layouts. Using a hotter motor on an old MR‑02 board, however, demands corresponding FET and gearing upgrades to avoid thermal shutdown or device failure.
Battery chemistries: AAA NiMH capacities, discharge curves, and runtime expectations on classic boards
Traditional Mini‑Z packs rely on AAA NiMH cells, and battery choice is as critical as motor selection. Modern low‑self‑discharge NiMH cells offer capacities between 750 mAh and 900 mAh, yet the usable energy depends heavily on discharge characteristics. A high‑quality 850 mAh cell can deliver consistent voltage under 5–6 A peaks, while cheaper cells sag quickly and reduce punch out of tight corners. Under typical club conditions, a 70T motor on an MR‑03 board provides 15–20 minutes of competitive runtime on a full charge; hotter 43T setups may drop that to 8–12 minutes. For heritage electronics, staying within the original voltage range and avoiding LiPo conversions reduces stress on ageing FETs and capacitors.
Electronic speed controller (ESC) and FET architecture: current handling, MOSFET upgrades, and thermal limits
In classic Mini‑Z boards, the ESC is built around a discrete MOSFET H‑bridge rather than a monolithic driver IC. Each pair of FETs handles forward and reverse current, with stock devices rated for around 10–15 A peak in short bursts. That may sound generous, but repeated high‑current spikes from aggressive gearing can overheat the silicon, especially in enclosed bodies with limited airflow. Many racers perform FET stacking, adding parallel MOSFETs (for example, 3010 or 4562 types) to increase current capacity and lower resistance. It is critical to respect thermal limits: adding heat sinks, spacing batteries to allow airflow, and avoiding excessive braking duty cycles all help older boards survive modern high‑torque motors.
Radio protocols: AM 27/40 MHz vs 2.4 GHz ASF/FHS, latency, and interference characteristics in Mini-Z racing
Early MR‑01 and first‑run MR‑02 chassis relied on AM 27 or 40 MHz radios, which suffer from interference and require crystals to set channels. In busy indoor environments, signal noise from fluorescent lighting or other R/C systems could cause glitching or brown‑outs. The shift to 2.4 GHz ASF and later FHS protocols radically improved reliability. Latency dropped, control inputs became more linear, and dozens of drivers could share the same venue without frequency clashes. For heritage Mini‑Z racing, many clubs now permit only 2.4 GHz chassis, both for safety and for consistent lap timing, while AM cars are increasingly reserved for collectors or casual home use.
Body shells and scale detailing: iconic classic Mini-Z car models and liveries
Classic japanese sports car bodies: AE86 trueno, datsun 240Z (S30), and hakosuka skyline Mini-Z implementations
Japanese classics form the backbone of many Mini‑Z collections. The Toyota AE86 Trueno body captures the sharp lines and pop‑up headlights of the drift icon, available in panda white/black or vivid race liveries. The Datsun 240Z (S30) appears with long bonnet, ducktail spoiler, and over‑fender kits that echo SCCA and Fuji Speedway racers from the 1970s. The boxy Hakosuka Skyline GT‑R body combines subtle chrome detail with muscular arches, making it a favourite for both shelf queens and RCP racers. These shells are usually paired with 90–94 mm wheelbases and RM or MM mounts, giving nimble yet stable handling that suits technical layouts.
European legends in Mini-Z form: porsche 911 carrera RS, lancia stratos, and classic BMW M3 E30 bodies
European sports cars and rally heroes also feature heavily in classic Mini‑Z line‑ups. The Porsche 911 Carrera RS, with its ducktail spoiler and Fuchs‑style wheels, delivers that unmistakable rear‑engine silhouette in miniature. The Lancia Stratos, short‑wheelbase and wedge‑shaped, brings Group 4 rally charisma with wide arches and rally spotlights sheathed in clear plastic. The BMW M3 E30 body showcases box‑flare DTM styling, perfect for recreating period racing liveries. These bodies often reward accurate wheel offset and lower ride heights; when dialled in, they combine scale realism with agile, tail‑happy handling that feels faithful to their 1:1 counterparts.
Wheel offset, tyre compound, and body mount fine-tuning for scale realism and performance
Wheel offset is a subtle but powerful tuning lever. Too much offset and the wheels protrude unrealistically, rubbing the arches; too little and the car looks under‑tired and can traction‑roll due to a narrow stance. Classic Mini‑Z wheels are available in increments such as +0, +1.5, +2.5, and beyond, matching specific body shells. Tyre compound then completes the picture: a 20° rear slick with a 30° front radial is a common baseline for high‑grip RCP tracks. Body mount shims and optional hard mounts allow precise body centring, so the shell does not contact the tyres under roll. Achieving the right combination makes your car look like a finished scale model yet behave like a race machine.
Paint schemes and sponsor decals: replica liveries from fuji speedway, nürburgring, and monte carlo rally
One of the joys of classic Mini‑Z ownership is recreating iconic race liveries. Enthusiasts regularly transform blank white bodies into replicas of Fuji Speedway touring cars, Nürburgring endurance entrants, or Monte Carlo Rally legends. Layered paint masks, fine‑line tape, and water‑slide decals help reproduce complex schemes like JPS black‑and‑gold, Martini stripes, or period Japanese sponsor logos. Clear coats add depth and durability, while small details such as window banners and number plates elevate the finish. For many collectors, the painting and decalling process is as satisfying as racing; each shell becomes a miniature tribute to motorsport history rather than just a replaceable body.
Handling characteristics and tuning setups for classic Mini-Z platforms
Front-end geometry tuning: camber knuckles, caster settings, and toe-in/out for carpet and RCP tracks
Front‑end geometry governs how your Mini‑Z turns in, holds a line, and exits corners. Adjustable camber knuckles allow settings from 0° to around 3° negative camber; 1.5° is a common compromise that improves grip without excessive inside‑edge tyre wear. Caster shims tilt the kingpins backward, increasing straight‑line stability and mid‑corner feel at the cost of a slightly heavier steering response. Toe‑out of 1–2° can sharpen initial turn‑in on tight indoor tracks, while mild toe‑in improves high‑speed stability on larger layouts. On RCP foam, where grip builds aggressively over a race day, small changes of 0.5° can transform how forgiving your car feels, especially under heavy braking.
Tyre selection: kyosho 20°–40° compounds, slicks vs radials, and staggered grip balancing
Tyres are the single most important tuning item on a classic Mini‑Z. Kyosho and aftermarket brands offer compounds from soft 20° to harder 40° and beyond. As a rule of thumb, RCP and smooth carpet demand softer rear tyres to generate traction and slightly harder fronts to prevent traction roll. Slicks provide maximum grip on clean surfaces, while radials or treaded tyres can feel more consistent on dusty or mixed‑grip floors. A popular setup for club racing is 20° rear slicks with 30° front radials; you can then fine‑tune with narrower or wider fronts to adjust steering balance. Treat tyre selection like choosing the correct tyre compound in real touring car racing: a well‑judged choice often beats pure motor power.
Weight distribution and centre of gravity: brass plates, low-profile batteries, and body lightening strategies
Managing weight distribution in a Mini‑Z is like tuning ballast in a GT car. Adding brass plates under the front or rear chassis shifts the centre of gravity (CoG) without changing total weight dramatically. A slightly front‑biased balance improves stability on entry, while a rear‑biased setup enhances rotation but can become snappy. Low‑profile batteries and lightweight body shells reduce CoG height, limiting roll and reducing the risk of traction roll on grippy RCP. Some racers carefully thin the inside of polycarbonate windows or remove unnecessary interior plastic to shed grams, always ensuring durability remains acceptable. For a typical 130–150 g race‑ready Mini‑Z, moving even 5 g can noticeably change balance.
Differential configurations: ball diff vs gear diff, silicone oil viscosity, and on-power/off-power behaviour
Rear differential choice defines how your classic Mini‑Z responds to throttle inputs mid‑corner. A stock gear diff with light grease allows relatively free rotation, favouring on‑power steering but sometimes causing instability on corner exit. A ball diff can be tightened or loosened to fine‑tune slip; tighter settings improve forward traction and straight‑line stability, while looser settings mimic an open diff. Some AWD MA‑010/015 drivers pack diffs with silicone oil of 5,000–30,000 cSt, using thicker oil in the rear to reduce inside‑wheel spin. This is similar to tuning limited‑slip differentials in full-size cars, where on‑power push or rotation can be controlled by differential locking characteristics.
Collectability, parts support, and restoration of vintage Mini-Z cars
Identifying rare classic Mini-Z releases: limited-edition bodies, discontinued chassis, and collector references
The collectability of classic Mini‑Z models has increased significantly over the past five years. Certain limited‑edition bodies, such as first‑run JDM colours of the AE86 or early race‑spec Skylines, command premiums on auction sites. Discontinued chassis like the original MR‑01 or specific MA‑010 variants are also gaining value, especially when boxed and unmodified. Identifying rare releases often hinges on small details: wheel design, decal variations, or minor mould differences. Keeping a personal reference list with release years, part numbers, and original colour schemes helps you avoid overpaying and ensures that any restoration work remains faithful to the original specification.
Sourcing OEM and aftermarket parts: kyosho spares, PN racing, atomic, and reflex racing components
Maintaining and upgrading heritage Mini‑Z cars depends on reliable parts sources. Kyosho still produces many OEM spares, including suspension arms, T‑plates, and standard electronics for MR‑03‑era cars. Specialist brands such as PN Racing, Atomic, and Reflex Racing provide hop‑ups ranging from high‑grip tyres to machined motor mounts, double‑wishbone front ends, and competition‑grade FET stacks. When chasing vintage parts, mixing OEM and aftermarket intelligently is essential: aim to preserve original character in collector cars while using modern components in racers. Keeping a small inventory of consumables—gear sets, kingpins, ball ends, and servo gears—ensures that a minor breakage does not sideline a beloved classic for months.
Restoration workflows: PCB re-capping, servo gear replacement, and body shell repair with styrene and epoxy
Restoring a vintage Mini‑Z is closer to watchmaking than typical R/C wrenching. A practical workflow might follow these steps:
- Inspect the chassis for cracked plastic, worn gears, and corroded terminals, noting parts for replacement.
- Service the electronics by cleaning the PCB with isopropyl alcohol, re‑capping ageing electrolytic capacitors, and checking FET solder joints.
- Rebuild the steering servo with new gears and fresh grease, ensuring full travel without binding.
- Restore the body shell using styrene patches behind cracks, epoxy or CA glue for reinforcement, and careful sanding before touch‑up paint.
Using styrene strips inside damaged arches or rooflines strengthens repairs while staying compatible with polystyrene bodies. For severely yellowed clear parts, gentle polishing and clear coat application can revive windows and light lenses, preserving as much original plastic as possible.
Preserving classic Mini-Z cars: storage conditions, plastic ageing, and documentation of original specifications
Long‑term preservation of classic Mini‑Z models requires attention to environment and documentation. Plastics and paints age fastest under UV light and big temperature swings; storing cars in opaque boxes at 15–25°C with moderate humidity helps prevent warping and cracking. Batteries should be removed to avoid leakage damaging the PCB and chassis. Keeping original manuals, decals, and option sheets together with each car adds provenance, especially for limited editions. Many collectors photograph their cars from multiple angles and record original gearing, wheelbase, and body codes, so any future restoration can return the model to factory‑correct condition. Treat each Mini‑Z like a scaled‑down classic car: regular gentle exercise, careful storage, and thorough records will keep it running and looking its best for years.